Would you love to get started on LinkedIn but struggle to know what to post? Or maybe you feel a bit intimidated by the bro marketers?
Honestly, there’s no need to worry.
At heart, LinkedIn is no different from any other platform. It’s simply people connecting with other people and you get to choose who those people are.
If you haven’t visited the site for a few years, you might be surprised at how it’s changed. The platform is much more relaxed than it used to be and it’s lots of fun too.
Yes, it’s still a professional networking site – but it’s a brilliant place to forge working relationships with other like-minded business owners and to build your personal branding.
And unlike sites such as Facebook and Instagram, where small businesses have to ‘pay to play’, on LinkedIn it’s still relatively easy to get engagement and lots of eyeballs on your posts.
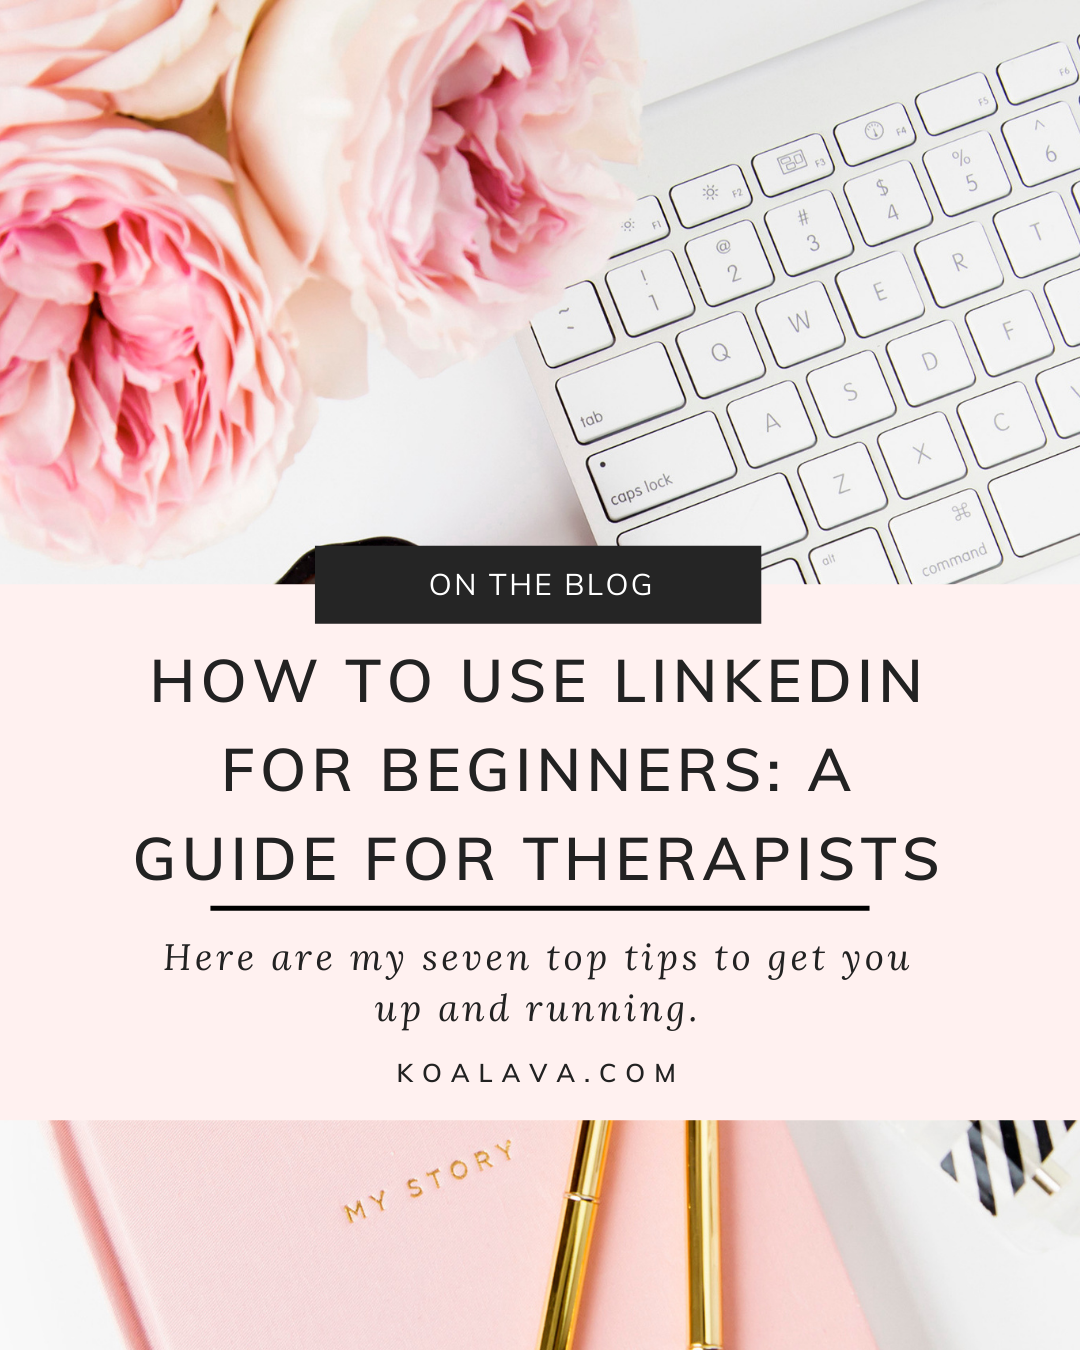
Here are my seven top tips to get you up and running.
1. Use a professional headshot
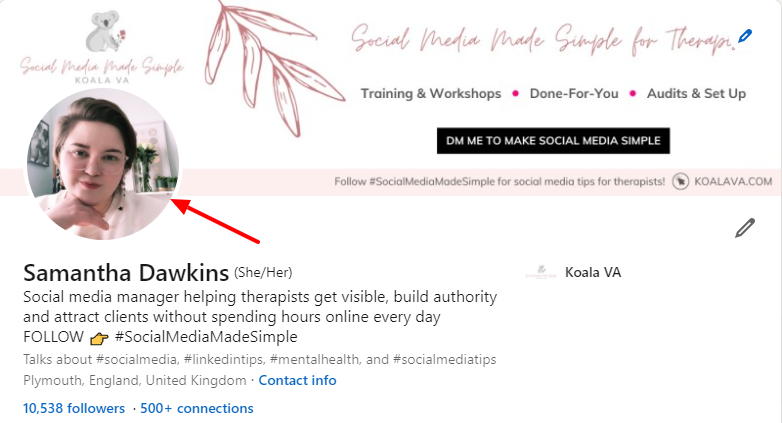
LinkedIn is a professional networking site so it’s important you present a professional image.
In other words, don’t be tempted to crop your friends out of your favourite photo from your cousin’s wedding in 2018.
But professional doesn’t have to mean boring. Take a picture on your smartphone and upload it to pfpmaker.com – it’s a profile pic app that lets you add cool backgrounds or your own brand colours to your image.
2. Create a bespoke banner
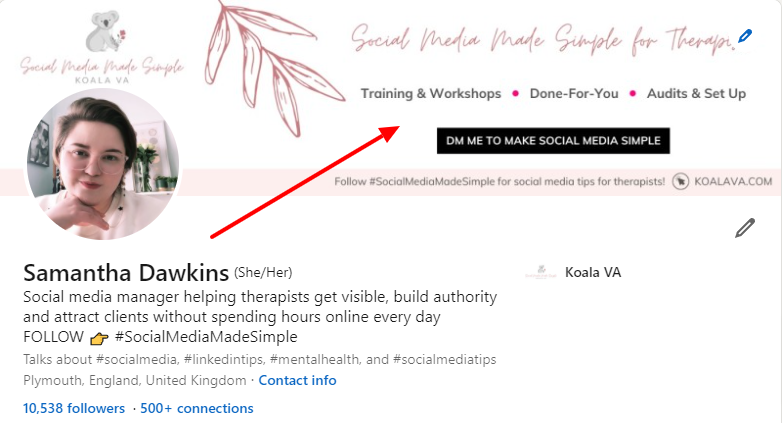
The banner section on LinkedIn is a great place to make a statement and shout about anything special you’re involved with.
Although it’s not clickable, you should include a call to action – such as your website URL – and change your banner regularly to promote your latest offering.
You can create your own banners using a free design tool such as Canva.
One thing to bear in mind, though. When you view the banner on desktop your profile picture appears on the left. However, when you view it on a mobile, your picture will be in the middle.
To avoid your profile pic obscuring important info, place all your banner content across the top, or set on the right-hand side.
3. Personalise your URL
When you first join LinkedIn, your profile URL (the link you share with others or put on your business card) contains a bunch of random numbers after your name – this looks messy and unprofessional.
To create a bespoke link, click on ‘Edit public profile and URL’ in the top right-hand corner of your profile page and then go to ‘Edit your custom URL’ in the top right-hand corner of the next page.
4. Front-load your headline
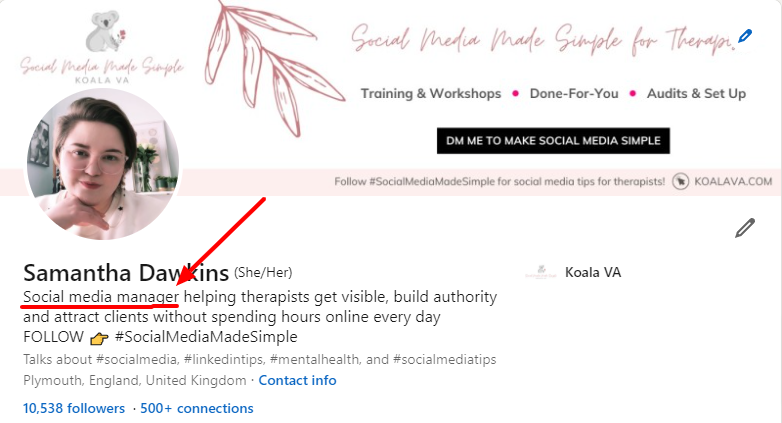
Your headline on LinkedIn is a prime piece of real estate and you should use it to your advantage.
Although you get 220 characters for your headline, the first 70 are the most important.
This is because other LinkedIn users only see the first section under your name when you respond to posts on the site. If people can clearly see what you do it might trigger them to connect with you. If they can’t, they’re unlikely to bother to find out.
When writing your headline get straight to the point. Don’t start with a phrase such as ‘Helping small businesses to…’ as this is a wasted opportunity to sell yourself. Instead, start with your job title.
You can then use the remaining 150 characters to tell people who you help and how you can transform their lives.
5. Make the most of the About section
Your About section is your chance to expand on your headline and share a bit more personality.
Not sure what to write? Break it down into these sections:
- What I do
- Who I work with
- How I can help you (outline the transformation people can expect after working with you)
- Why work with me (include your experience – keep it brief, people care about themselves more than they care about your history!)
- How to contact me (a link to your website, your email address, name of your Facebook group. These links won’t be clickable.)
6. Publish your first post
Your first post on LinkedIn can be nerve-wracking. You might be nervous that people will judge you, or maybe you feel intimidated by all the big-hitters with their 7-figure incomes and thousands of followers.
Look, forget them. Focus on you.
Your introductory post is the perfect place to tell people who you are, what you do and how you can help them. But you should also share some more informal info about your interests and hobbies.
It’s a good idea to post a new introduction post once every three months – this is a great way of saying hi to new followers and reminding existing ones that you’re still there.
7. Add some content to your Featured section
This area of your profile is designed to let you showcase posts, articles, your website, web links, images, documents, videos or presentations that you want to share.
Start by adding your website and linking to your introductory post so that people can read more about you.
This is also a great place to add images of client testimonials if you haven’t got any recommendations yet, or certificates and badges from courses you have completed.
Got a lead magnet, why not add that too?
Let’s connect!
If you’d like more help with LinkedIn, why not book a Power Hour with me? I’ll answer all your questions and share more top tips. Until then, feel free to send me a connection request – here’s my profile link.