Creating Instagram Reels feels daunting at first, and you might be worried they’ll take lots of time too.
But guess what? It doesn’t have to be scary or time-consuming and I’m here to show you how.
In this blog, I’m sharing my top tips for creating quick and effective Reels in no time at all, including three step-by-step guides so you can get started straight away.
So whether you struggle with the tech, the ideas or both, you’ll be able to make your first Reel as soon as you finish reading.
But before we get started, let’s take a quick look at some of the benefits of creating Reels for your business.
Why create Instagram Reels?
Instagram is heavily promoting video right now and, as the newest video feature on the platform, Reels are getting all the attention.
Not only do they get great reach, but they also generate lots of engagement and have a longer shelf life than grid posts. Did you know that Reels can keep getting new views weeks after they were originally posted?
Unlike Stories, which are only seen by people who follow your account, Reels are shown to everyone – whether they follow you or not.
This means your therapy business has the opportunity to be discovered by a much larger audience without you having to pay for ads.
OK, let’s get started…
Reel idea 1: Where I work
1) First, record a short video of your workspace/office/desk on your phone. It can be up to 60 seconds long.
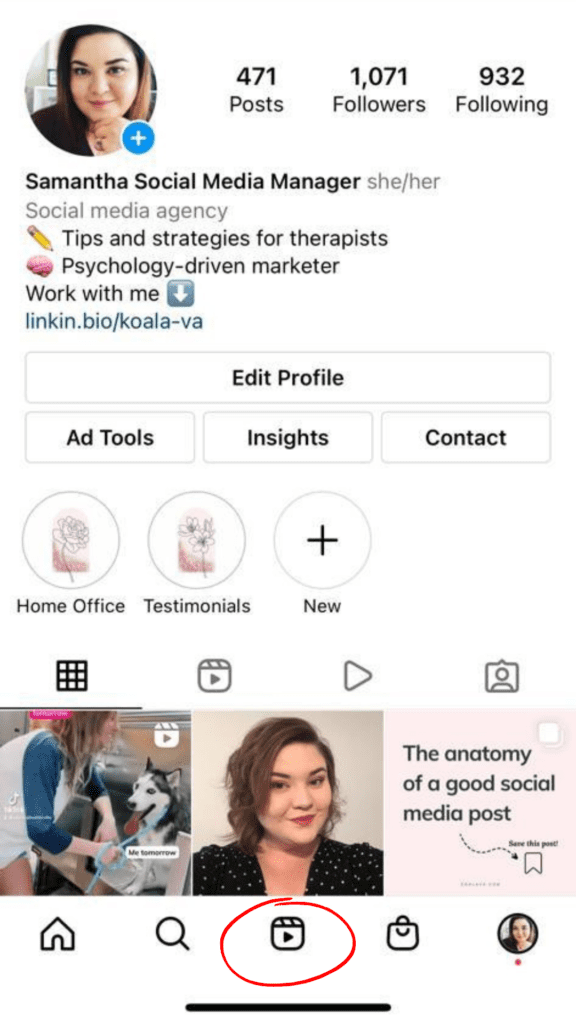
2) Next scroll through the Reels feed on the Instagram app – it’s the little clapperboard icon at the bottom of your profile page to find a piece of music you like.
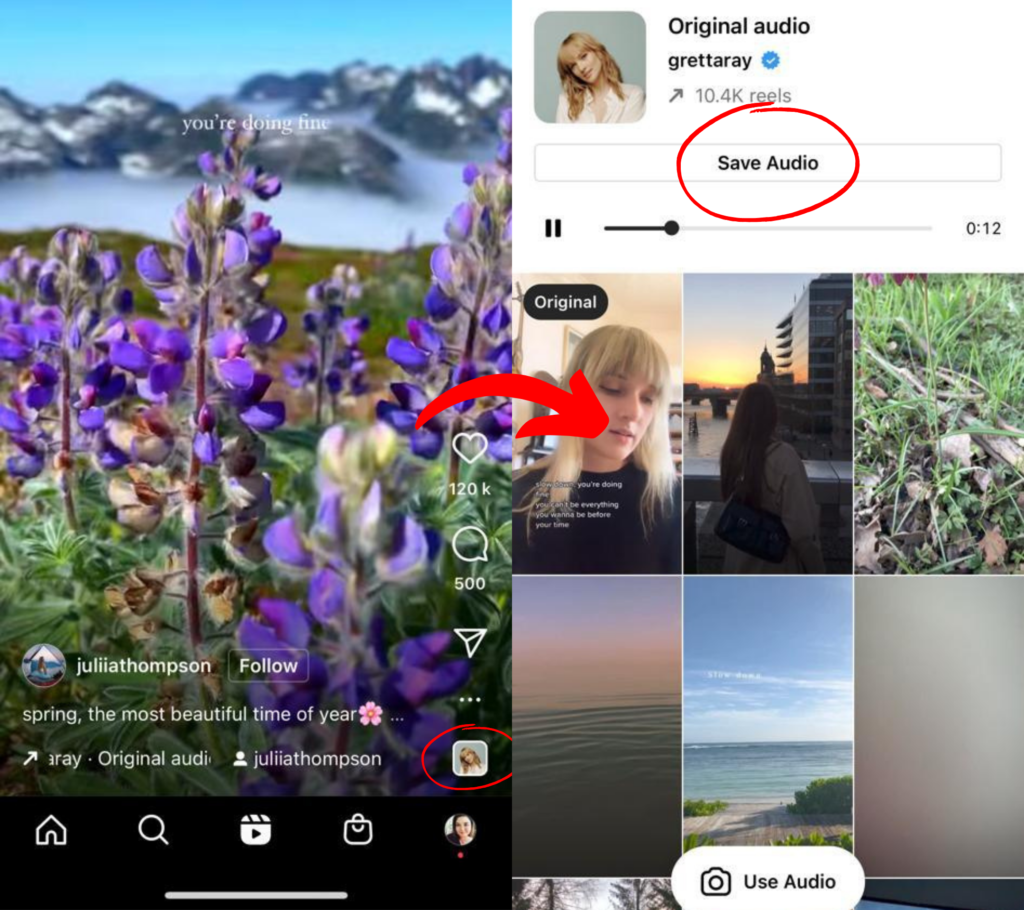
3) When you come across some music you like, click on the audio title that’s scrolling across the bottom of the screen and choose ‘Save Audio.’ (PRO TIP: If there’s a little arrow on the left it means the audio is trending.)
4) Now, from your profile page, click the + button in the top right-hand corner and choose Create Reel.
5) Tap on the Audio option on the left-hand side. Your saved audio will be stored in the Saved tab at the top of the screen. Click the audio to select it. Click Done.
6) Next, click on your camera roll in the bottom left-hand corner and find your video. Click Add and then Preview.
7) Add a caption explaining your Reel. Just like your grid posts, you can add up to 30 relevant hashtags. And don’t forget your call to action (CTA)!
8) OPTIONAL: Tap Cover (top left) to add a cover image to your Reel. You have the option of selecting a still from the Reel or choosing another image from your camera roll.
9) Finally, choose whether you want the Reel to appear on your grid as well as in our Reels feed then click Share. You’re done!
#Reel idea 2: Showcase
1) Follow the steps above but instead of uploading a single video, choose a selection of static images from your camera roll.
2) To select up to 10 images (step 6 above), tap the stacked square box in the top right-hand corner of your camera roll. Instagram will automatically sync your pictures to the music.
#Reel idea 3: A mini-tutorial
If you’re feeling brave, why not put your face on camera by recording a video straight to Reels?
1) From your profile page, click the + button in the top right-hand corner and choose Create Reel.
2) Choose how long you want your Reel to be by tapping on the Length icon on the left.
3) Tap the timer button on the left and select ‘Set Timer’. Once you tap the central record button you’ll be given a three-second countdown before the recording starts.
4) If you’re happy with your recording click Preview then add subtitles by tapping the smiley face icon at the top of the screen and choosing Captions. Subtitles will auto-generate.
5) If you want to start over, click on your recording (the small circle next to the central record button) and tap the bin then Discard.
6) Once your recording is ready, click Done, then Next, then add your post caption and hashtags and post.
Some final tips
- Shoot video in portrait mode
- Make sure your camera lens is clean
- Don’t worry about adding text to your Reels. Keep it simple.
- Use a tripod, clamp or homemade version to keep your phone steady
- When making ‘speaky’ videos make sure the mic is clear so the sound isn’t muffled